After writing your favorite Firefox extension, you must know how to load it into Firefox:
- Type “about:debugging” in the address bar of your Firefox browser and press enter.
- Click “This Firefox” on the left column.
- Click the “Load Temporary Add-on…” button on the right column, then locate and choose the manifest.json file of your custom extension on the popped up file dialog. If there is no problem, the information of your extension is shown below.

Now, your custom extension is active and you can observe its effects when you visit some web page on another tab of this Firefox.
Unfortunately, after you close Firefox and run Firefox again, your extension disappears. You cannot see it on the “about:addons” tab, which means your extension is not loaded automatically when Firefox restarts. You have to reload it by repeating the above steps.
On the “about:addons” tab, you may find several existing extensions. These are extensions you installed from https://addons.mozilla.org, the official Firefox add-on site. Those add-ons are verified by Mozilla, and can be installed by you and people around the world. Best of all, those verified add-ons are loaded automatically when Firefox starts. Your personal add-on is, however, not treated equally unless it is uploaded to Mozilla and gotten signed. Usually, unsigned add-ons cannot be loaded automatically when Firefox starts. You have to load it manually every time you run Firefox, as talked before.
If you really want to install a personal Firefox web extension permanently, you should follow the steps below.
- Pack your extension files/directories into a single zip file. Typically, your extension includes the following files: manifest.json(containing the information of your extension), icons(directory) containing the icon of your extension, script.js(the real work is done in this script).
- Install Add-on from the zip. On the “about:addons” tab, click the gear icon, you will see a menu item: “Install Add-on From File…”. Click on the menu item and choose the zip file formed in previous step.

Now, you may see the following warning:

How do I install an unsigned Firefox extension? You may find this post which tells you to turn off xpinstall.signatures.required in “about:config” tab. But the problem may persist after you set xpinstall.signatures.required to false. This is because you are using a release edition of Firefox. To install unsigned extensions permanently to Firefox, you should use a developer edition of Firefox. The default dark background of the developer version of Firefox makes it more attractive to coders and hackers.
- After you switch to the developer edition(or nighty edition) of Firefox and adjust the xpinstall.signatures.required setting, try to install the extension from file(as talked before). Yo will see the following warning:
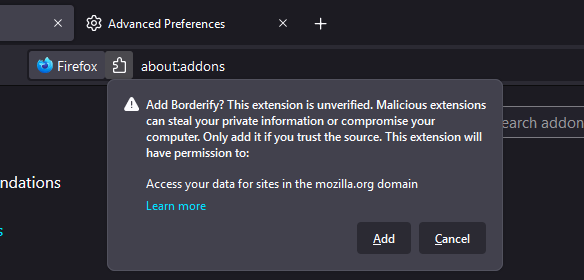
Click the “Add” button to continue. You will see the following screen:

Ticking on “Allow the extension to run in Private Windows” makes sure your custom add-on will run in private windows.
Now close Firefox and restart it again, you will find the unverified add-on is shown in the “about:addons” tab as other official verified add-ons.
Conclusion
This tutorial teaches you how to permanently add Temporary Addon. Three config tabs are involved:”about:debugging”, “about:config”, and “about:addons”. Dev extensions are usually loaded from “about:debugging”, but they cannot survive a Firefox restart. You can install a unverified extension from file on “about:addons” permanently but need a developer edition of Firefox. By the way, in “about:debugging”, you usually add unpacked extension in firefox(select a manifest.json file), but you can also install addon from zip(the packed extension files) there.
Tip admin with Cryptocurrency
Donate Bitcoin to admin

Donate Bitcoin Cash to admin

Donate Ethereum to admin

Donate Litecoin to admin
Donate Monero to admin
Donate ZCash to admin